Cloudflare DNS and Web3
There are a number of traditional web2 infrastructure companies and services who have extended themselves into the blockchain ecosystem. Cloudflare is widely known for its content distribution network (CDN). They also provide DNS services and IPFS Gateway solutions. You can view their Cloudflare Web3 docs for more information.
This guide will introduce you to setting up DNS hosting with Cloudflare and turning on their web3 features to enhance their DNS hosting services. If your website is already live, you should not switch DNS hosts without confirming first that the change will not cause downtime or misconfiguration of your DNS records.
Cloudflare DNS is also able to offer DNSSEC, which is one of the Requirements for DNS to ENS Integration
Step 1: Backup Your DNS Records
If you are migrating DNS from another provider, you should first backup and DNS records that have been made. Failure to do so may result in website downtime or email services for your domain to stop functioning.
Step 2: Add your domain to the Cloudflare Dashboard
You will need to add your domain to the Cloudflare dashboard in order to use their DNS hosting service. For the purposes of this guide we will be using the free tier level DNS hosting service. This service level may not be suitable for high traffic production sites so if you are planning to use this setup in production be sure it meets your capacity expectations.
Note: Before changing DNS providers, if DNSSEC is turned on at the current DNS host, you should turn the feature off before migrating DNS hosts.
Step 3: Update your Nameservers to Cloudflare
Cloudflare will display the assigned nameservers for the domain you just added DNS hosting services for.
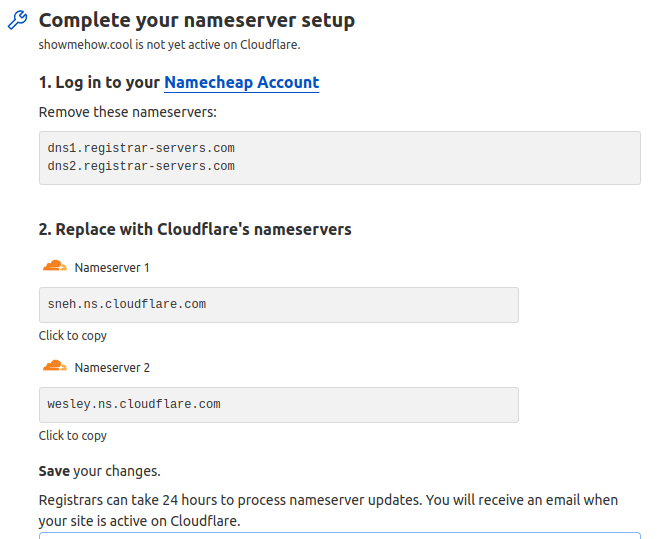
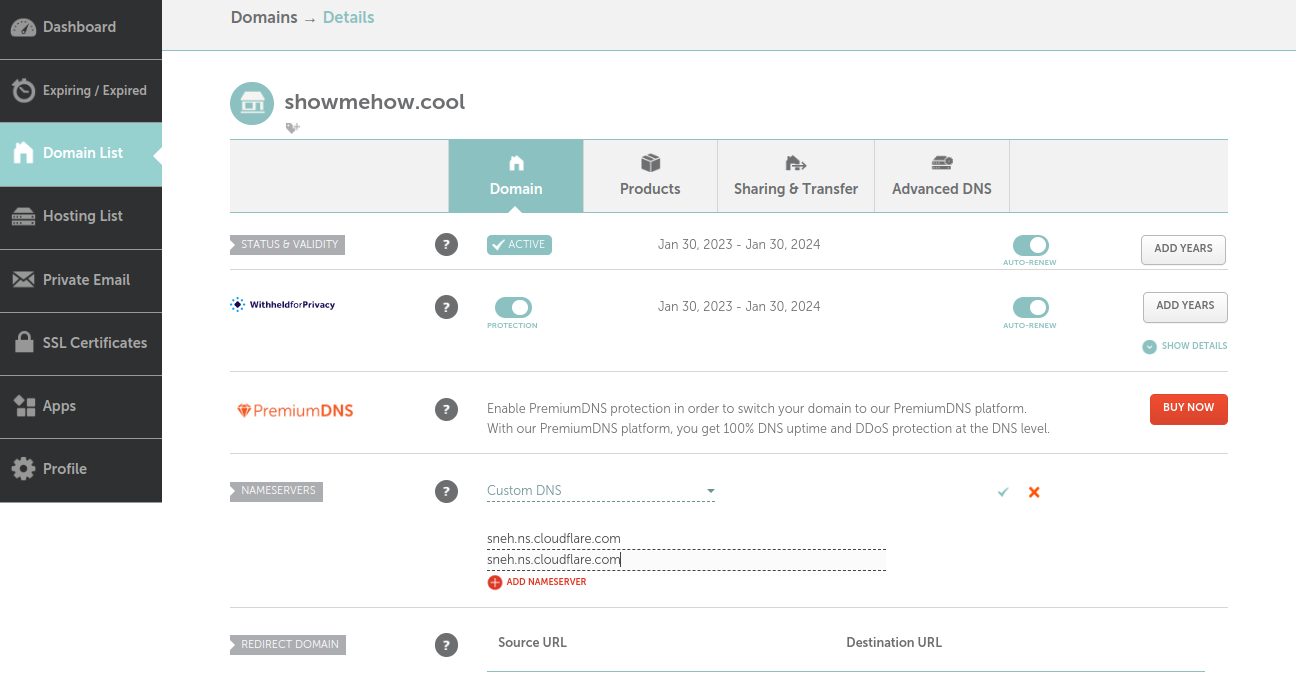
Next, update the Nameservers at your registrar. In this example, we are migrating from Namecheap DNS services to Cloudflare.
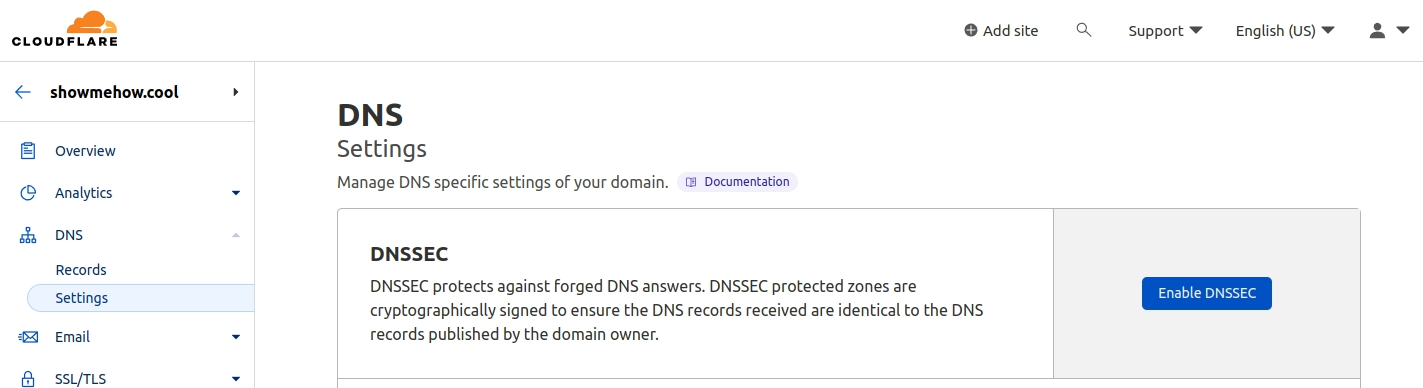
Step 4: Enable DNSSEC in Cloudflare for your domain
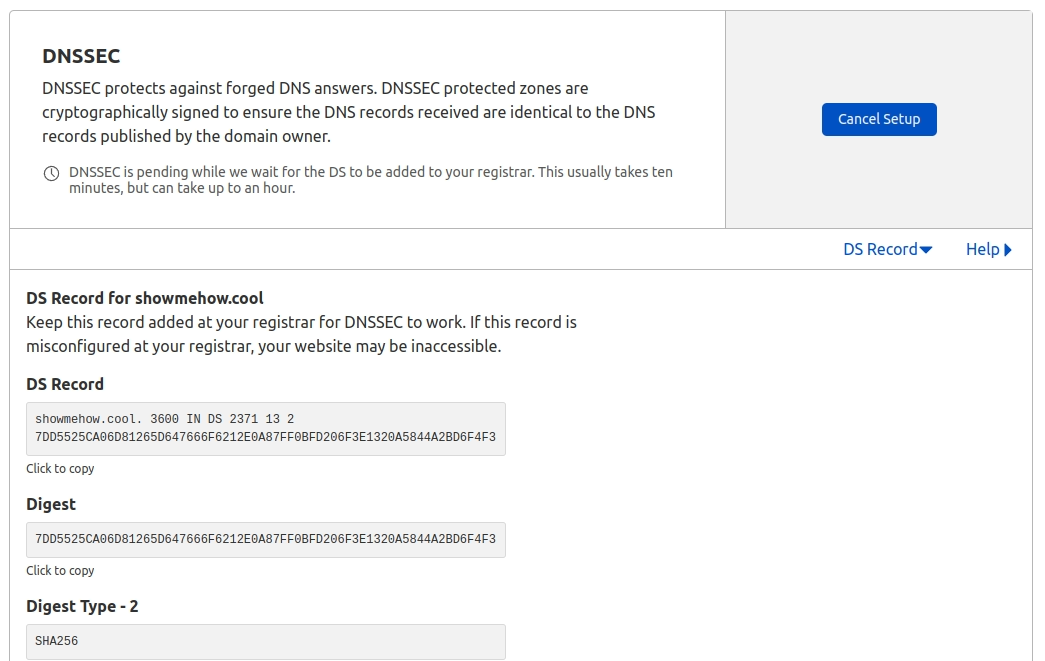
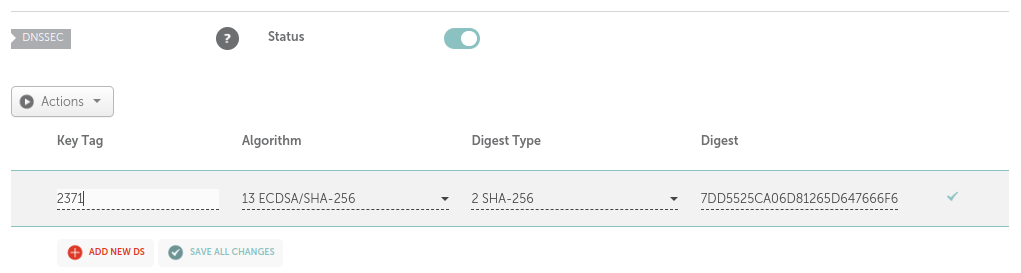
Step 5: Copy the DS Record from Cloudflare
In order for DNSSEC to work, you have to let your registrar know that Cloudflare DNS is now authoritative for your domain.
Step 6: Add the DS Key to the Registrar
Re-enable DNSSEC on the Namecheap registrar. Next, add the DS Record you saved from Cloudflare in the previous step.
Your DNS records are now hosted through Cloudflare. If you would like to test using Cloudflare’s IPFS Gateway, refer to: Serve Blockchain Content through DNS records