Serve Dynamic Blockchain Content through DNS records
One common question is how users can host a website on the blockchain. There are a variety of ways websites can be hosted using the blockchain.
A common solution is to use the InterPlanetary File System (IPFS) which is a decentralized peer-to-peer file storage network. IPFS works off of content identifiers(CID). These are labels based on the content’s cryptographic hash.
Since CIDs are based on the hash of the content, if the content changes, so does the CID. When pointing a DNS domain to IPFS content, it’s important to consider how often the content will change.
This guide will use IPNS (InterPlanetary Name System) to reference IPFS content instead of directly with a CID that would change once content is updates. To learn more about hosting unchanging content see: Host in Parallel DNS and ENS static content from IPFS
How do DNS records point to website content?
In traditional web hosting content is normally delivered by web servers. When a user visits a web address a request is sent to their ISP that looks up the Name Servers and corresponding IP addresses to determine where the DNS records can be located.
The ISP will first check if it has this information cached. If not, then the ISP does a look up on the root TLD to find the Nameservers and IP addresses for the domain.
The Nameservers store and lookup the DNS records set up for the domain. For instance, the A-record in DNS usually points to the web server that will serve the web page to the user. Another example of DNS records a Nameserver might return are MX records.
Whenever someone sends an email to a user @ a domain, the DNS records for the domain are queried from the nameservers, and an MX or “mail exchange” record is returned. The MX record specifies which mail server is responsible for accepting email messages for the domain.
Using an IPFS Gateway to Resolve Decentralized Content
We’ve seen how DNS records can use a type of record called an A-record to find the IP address of the web server that will return the website content to the user.
What if instead of pointing queries for yourwebsite.com to a server, you could point to a data storage location on the blockchain like IPFS? This way your content is not served by a traditional web server, but instead using static files stored on the decentralized IPFS network.
When a user requests content through an IPFS gateway, the gateway will retrieve the content by using a blockchain location identifier (CID or IPNS name) to fetch the content from the IPFS network. The gateway will then serve the content as a web page to the browser.
Setup Decentralized Web Hosting
In this example, we will be using Cloudflare’s IPFS gateway which has a free tier level available to experiment with. Depending on your website traffic, you will want to make sure the free tier covers your website traffic needs.
Adding files to the IPFS network can be done in a variety of ways, including using third party pinning and upload services. Most platforms allow users to upload and pin a free tier amount of storage.
Some popular IPFS pinning sites include Pinata, web3.storage, Filebase, Lighthouse Storage. These services will allow you to upload files to the IPFS network, and pin them to mark them as important so that the files remain on the network. IPFS works by pinning, which flags the content to be ignored by the cleanup “garbage collector”. This mechanism is used by the IPFS network to delete unneeded files.
Step 1: Save Your Static Website Files using IPFS Desktop
Instead of relying on a centralized pinning service, we can use a hybrid model. We will first run our own IPFS node by simply using the IPFS Desktop app. It supports all major operating systems (Linux, Windows, Mac, etc) and be downloaded here: https://github.com/ipfs/ipfs-desktop/releases
Step 2: Edit and Save your Website’s Static Files
You will want to create a folder to save your static website files in. We are setting up a simple website that will not rely on dynamic content, though it is possible to load dynamic content including blockchain data through querying APIs via Javascript. That is out of scope for this guide, but it should be noted this is possible. See Host in Parallel DNS and ENS content from IPFS
You can find static website templates online or use static generators such as Hugo or Gatsby. There are many more static site generators, as well as static website templates. The static generator used on this site is currently Eleventy For this example we won’t be installing a static generator. Instead we’ll just be downloading a static website and just edit the ready made template: Static Bootstrap Templates.
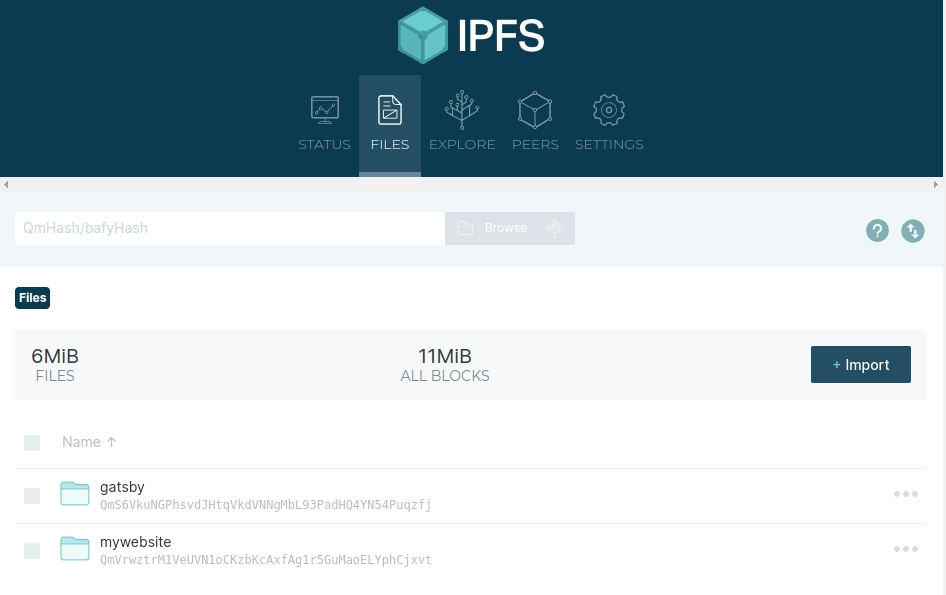
Step 3: Upload Your Website Folder into IPFS
Once you’ve edited your static content files, save everything in the same folder. You could name the folder “mywebsite” or “gatsby” but the name is not important as the end user will not see that.
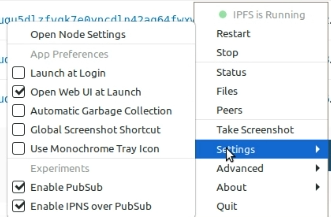
Step 4: Enable IPNS and Pubsub in IPFS Desktop
In the settings of IPFS Desktop, be sure that IPNS and Pubsub is enabled. While IPFS Desktop is running, right click on the icon in the system tray and look for the settings area.
Step 5: Generate a New IPNS Key
IPNS is a IPFS location naming system that will preserve the CID (Content Identifier) so that it does not change. What this allows for is pointing to a decentralized file storage location that will always be located by the same identifier. Otherwise, when we point the DNS records to the decentralized content, those records would need to be set up each time a new version of the static files were uploaded. Instead, using IPNS, the content location is preserved even if new files are added into the folder.

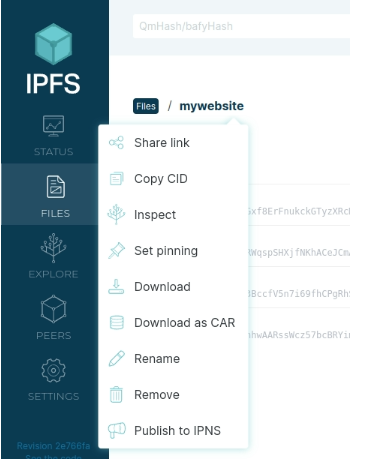
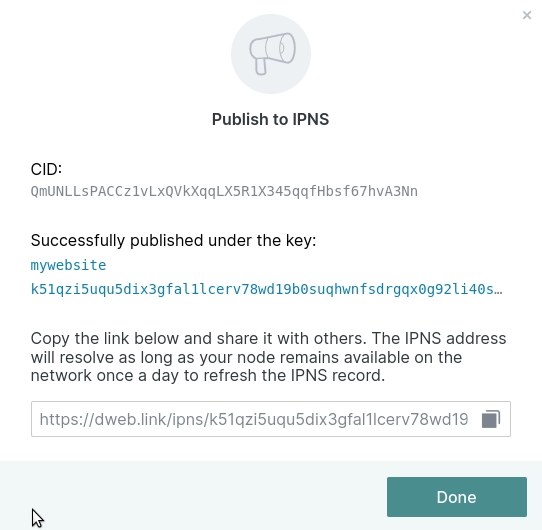
Step 6: Publish to IPNS
Once your folder for your website content has been added to IPFS Desktop, right click on it and select “Publish to IPNS”.
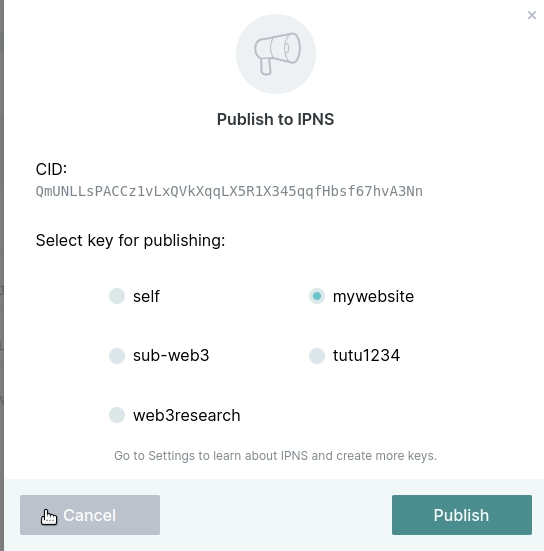
Now, select the key name you generated in Step 5.
Step 7: Copy the IPNS Location
Once the CID is published to IPNS, note the long character string that is returned. Copy this somewhere so you will have it for the next step. You can always go back and find the IPNS key by looking at the IPNS keys section of the settings page in IPFS Desktop.
Step 8: Turn on the IPFS Gateway Feature in Cloudflare DNS
It is possible to run your own IPFS Gateway. In this example we will be using Cloudflare’s IPFS Gateway, as it’s easy to set up in their web3 dashboard.
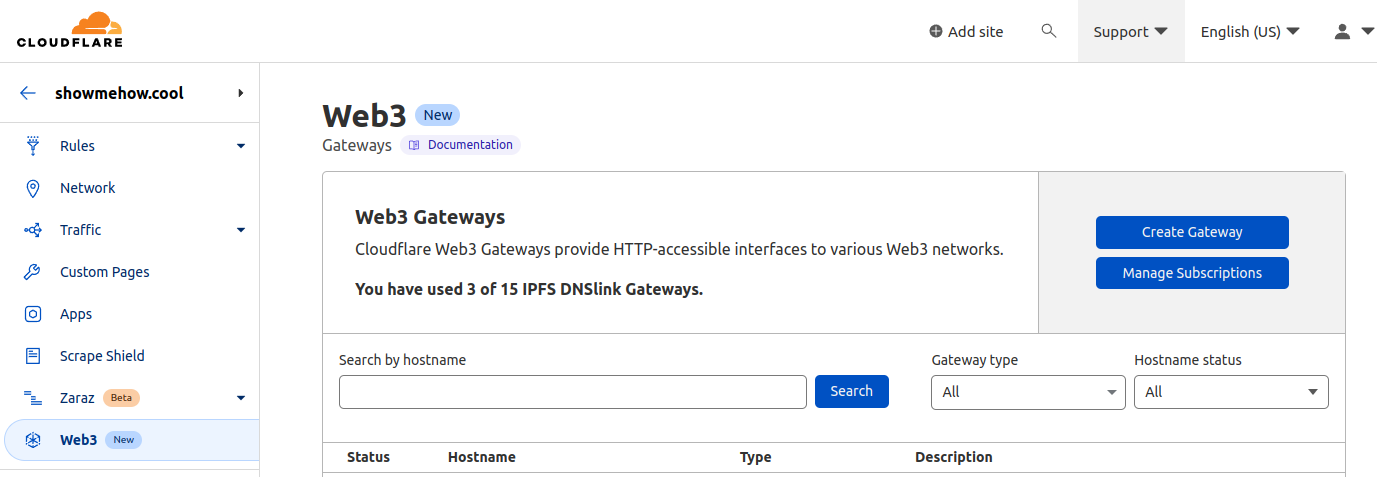
On this screen click “Create Gateway”
Step 9: Auto-generate the DNS records to resolve IPFS content through the IPFS Gateway
There are a couple DNS records that need to be set up in order for a website visitor to be served the web page content from the IPFS files you uploaded and pinned to the network using IPFS Desktop.
- A CNAME record that points to the IPFS Gateway location
- A TXT record that uses the key
_dnslinkand the saved value of the IPNS location we saved from Step 7.
Instead of creating these two records manually, Cloudflare’s dashboard does this for us when we set up the gateway details.
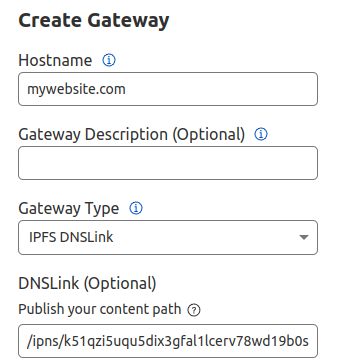
The hostname is your website domain. It can also be a subdomain like blog.mywebsite.com. This information is used to auto-generate the CNAME record that is allowed to hit the IPFS Gateway.
Filling out the optional DNSLink field will create a TXT record for the DNSLink that points to the IPNS location.
Save the changes and allow the DNS records to propagate through the Internet. Visit your website and if all was setup correctly you will see a static website served through IPFS using decentralized hosting on the blockchain!
Optional: Pin Local IPFS files to External Pinning Services
When your website content is resolved by the IPFS Gateway, there can be a lag time and slow loading of the content. This is because of the way caching works with the IPFS network. To find the IPNS content, the gateway needs to fetch the file from your IPFS Desktop node. Since that is the only place the content exists, it has to travel a long way.
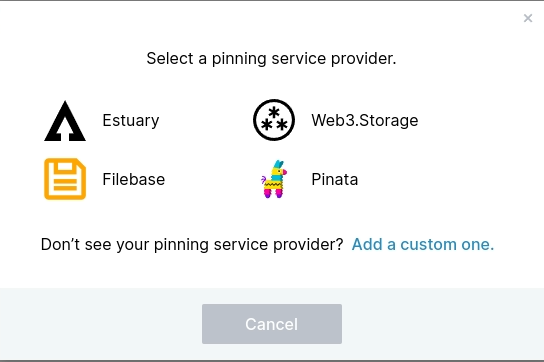
You can use a centralized pinning service to pin the IPNS content to other nodes. This will allow the content to resolve faster, as there will be more copies of the data on other nodes besides your local node you are running through IPFS Desktop. You can pin to other IPFS storage services within IPFS Desktop as shown in the image above.
You can also log directly into most pinning service platforms and specific a CID you would like to pin, even if that content was not uploaded originally through the pinning service.